another technical blog...technically

Monday, April 30, 2018

Just another out-of-date but maybe useful trick with KnockoutJS

I know what you're thinking about: another post on KnockoutJS? Again?
To be extremely clear, i 've written this post a lot of months ago but i never completed and published, and really i could not just delete it.

So today i will show you just a little example of comunicating widgets: it's not something complicated, but i think it can be also reproduced in other JS framwork.
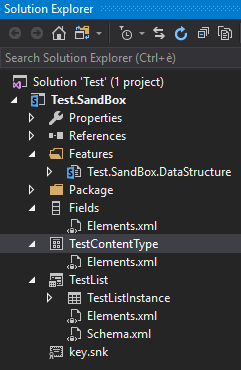
Basically, let's assume we have a HTML which contains 2 widgets, the first one is auto-consistent and reusable, while the second one depends on the previous (to be honest this is a derivation from the real world example, when i have 4 widget comunicating one with each other but...).

So we have the code of the first controller, which is the child one.
window.Dummy = window.Dummy || {};
window.Dummy.Custom = window.Dummy.Custom || {};
window.Dummy.Custom.View = window.Dummy.Custom.View || {};
window.Dummy.Custom.View._Child = window.Dummy.Custom.View._Child || {};

(function (controller, utility, api, $, ko) {
    // View model definition
    controller.ViewModel = function viewModel() {
        var vm = this;
        vm.Items = ko.observableArray();

        // Search in all view model items
        vm.Get = function (id) {
            //identify the first matching item by name
            vm.firstMatch = ko.computed(function () {
                var search = id.toLowerCase();
                if (!search) {
                    return null;
                } else {
                    return ko.utils.arrayFirst(vm.Items(), function (item) {
                        return ko.utils.stringStartsWith(item.Id, search);
                    });
                }
            }, vm);

            return vm.firstMatch();
        };

 ...
    };

    // Controller definition
    controller.Loaded = ko.observable(false);
    controller.LoadData = function (data) {
        controller.Vm.Items.push.apply(controller.Vm.Items.sort(), data);

        ...
    };
    controller.Vm = new controller.ViewModel();
    controller.Wrapper = document.getElementById("workout-definitions");

    // Controller initialization
    controller.Init = function () {
        ko.applyBindings(controller.Vm, controller.Wrapper);
        api.GetAll(controller.LoadData);
    };

}(window.Dummy.Custom.View._Child = window.Dummy.Custom.View._Child || {},
    Dummy.Custom.Utility,
    Dummy.Custom.Api._ChildItems,
    jQuery,
    ko));

The controller is capable of calling the API exposed for the objects of this widget so it's possible somelike indipendent from the context. The instance of the view model exposes the Get Method, which searches into the array of objects loaded from API and return a single object.
Here there is instead the code of the parent widget:

window.Dummy = window.Dummy || {};
window.Dummy.Custom = window.Dummy.Custom || {};
window.Dummy.Custom.View = window.Dummy.Custom.View || {};
window.Dummy.Custom.View.Parent = window.Dummy.Custom.View.Parent || {};

(function (controller, 
 utility, 
 $, 
 ko,
    parentApi,
 childView) {

    // View model definition
    controller.ViewModel = function viewModel() {
        var vm = this;
  ...
    };

    // Controller definition
    ...

    // Controller init
    controller.Vm = new controller.ViewModel();
    controller.Init = function (data) {
        controller.LoadUserData(data);

        // Await widgets readyness and then fire method  
        // Load events if athlete is new
        childView.Loaded.subscribe(function (newValue) {
            if (newValue === true) {
    ...
            }
        });
    };
 
    ...
}(window.Dummy.Custom.View.Parent = window.Dummy.Custom.View.Parent || {},
    Dummy.Custom.Utility,
    jQuery,
    ko,
    Dummy.Custom.Api.ParentItems,
    Dummy.Custom.View._Child,
));

As you can imagine i dropped most of the code just to show you the concept. The parent widget is dependant of Child controller, which could be started calling Child.controller.Init everywhere (maybe on document loaded event), the parent is only subscribed to the Child.Loaded variable.
This means that, when the child finished to load data, Parent is triggered to do something else, and this could be someway useful.
It's clear you can use the model with more than one widget, with more than one triggered event, and you have to take care about the data you load, because you will use every widget as a item container, rather than just a graphical item.
Hope you find it useful even if outdated, but i preferred to share this blog post because maybe you can replicate the model using other JS frameworks that support the event subscription technique.
Share:

Monday, April 23, 2018

Another HOWTO about media center on Raspberry pi3 (Part 2/2)

I promised this article would be just a little bit more interesting, indeed i will share the bash scripts i did to manage some activities.

sendip.sh

I've created a simple script which send me an email when the IP changes, or it send me the IP by default at midnight. At first i subscribed to a service called smtp2go, installed ssmtp and configured ssmtp like this:
sudo apt-get install ssmtp mailutils 
sudo nano /etc/ssmtp/ssmtp.conf 

rewriteDomain=smtp2go_ChosenDomain
AuthUser=smtp2go_AccountUsername
AuthPass=smtp2go_AccountPassword
mailhub=mail.smtp2go.com:2525 
UseSTARTTLS=YES 
FromLineOverride=YES 

After that i wrote down those lines:
#!/bin/bash
# Just a script to send me an email with my IP
# Use "sendip" to execute the command and "sendip force" to force email send

# Const
readonly LAST_IP_FILEPATH="/home/pi/scripts/lastIp"
readonly MAIL_RECIPIENT="myemail@email.com"

# Main
CURRENT_IP=$( curl ipinfo.io/ip )
LAST_IP=""

# If 'force' delete IP file content
if [ "$1" = "force" ] || [ ! -e $LAST_IP_FILEPATH ]
then
    echo "[INFO] Creating new file containing IP"
    echo "" > $LAST_IP_FILEPATH
    echo $CURRENT_IP > $LAST_IP_FILEPATH
    echo "[INFO] Sending email containing IP"
    echo "$CURRENT_IP" | mail -s "IP" $MAIL_RECIPIENT
else
    echo "[INFO] File found, getting last ip from file"
    LAST_IP=$( cat $LAST_IP_FILEPATH )
    if [ "$LAST_IP" = "$CURRENT_IP" ]
    then
        echo "[INFO] IP not changed since the last poll, no need to send an email"
    else
        echo "[INFO] Whoah! ip changed, i need to send you the new one"
        echo $CURRENT_IP > $LAST_IP_FILEPATH
        echo "$CURRENT_IP" | mail -s "IP Changed" $MAIL_RECIPIENT
    fi
fi

After i make the scipt executable as a bash command
path="/home/pi/scripts/sendip.sh"
sudo ln -sfT "$path" /usr/local/bin/sendip
chmod +x "$path"

Then, finally, i register the command in crontab, paying attention to change the first row like this. The sendip command will try to understand if the IP changed last time, if yes, it will send you an email with the new public IP.

convert.sh

The other script I created helps you converting media files, so if you have something the media player can't play, you can use the script to launch a media conversion

#!/bin/bash
# Just a wrapper to avconv with my preferred settings


# Const
readonly INPUT_DEFAULT_DIR="/media/Vault/Download/2Convert/"
readonly OUTPUT_DEFAULT_DIR="/media/Vault/Download/"
readonly MAIL_RECIPIENT="youremailaddress@email.com"
readonly MAIL_SUBJECT="LittleBox: File converted"


# Function
sendMail(){
 endEpoch="$(date +%s)"
 
 # Compute the difference in dates in seconds
 tDiff="$(($endEpoch-$startEpoch))"
 # Compute the approximate minute difference
 mDiff="$(($tDiff/60))"
 # Compute the approximate hour difference
 hDiff="$(($tDiff/3600))"
  
 message=""
 if [ $mDiff -gt 59 ]
 then
  message="File $inputFile processed in approx $hDiff hours"
 else
  message="File $inputFile processed in approx $mDiff minutes"
 fi
 
    echo $message | mail -s "$MAIL_SUBJECT" $MAIL_RECIPIENT
}

executeFileConversion() {
 inputFile=$1
 outputDirectory=$2
 startEpoch="$(date +%s)"

 # Get filename and create output file
 filename=$(basename "$inputFile")
 extension="${filename##*.}"
 filename="${filename%.*}"
 outputFile="$outputDirectory$filename.mkv"
 echo "[INFO] Output file will be: $outputFile"
 
 cmd="avconv -i '$1' -c:v libx264 -preset medium -tune film -c:a copy '$outputFile' -y"
 echo "[INFO] Conversion command will be: $cmd"
 eval $cmd
 sendMail $inputFile $startEpoch
}

executeFileConversionDefault() {
 IFS=$'\n'
 files=( $(find $INPUT_DEFAULT_DIR -type f) )
 for i in "${!files[@]}"; do 
  echo "[INFO] Executing conversion of '${files[$i]}'"
  executeFileConversion "${files[$i]}" "$OUTPUT_DEFAULT_DIR"
 done
}


# Main
if [[ $# -eq 0 ]] ; then
    echo "[INFO] No parameter specified, all file in default dir will be processed"
 executeFileConversionDefault
elif [[ $# -eq 2 ]] ; then
 executeFileConversion "$1" "$2"
fi

p2p.sh

I used the last script to shutdown the p2p application when i saw the were decreasing the pi2 performances. The pi3 does not suffer anymore multithreading because it has more firepower, but maybe it could be useful to some of you
#!/bin/bash
# Just a script to start/stop p2p services
# Use "p2p start" to start all registered services and "p2p" stop to shutdown

# Const
startCmd=( )
# Amule
startCmd[0]="sudo /etc/init.d/amule-daemon start"
# Transmission
startCmd[1]="sudo service transmission-daemon start"

stopCmd=( ) 
# Amule
stopCmd[0]="sudo /etc/init.d/amule-daemon stop"
# Transmission
stopCmd[1]="sudo service transmission-daemon stop"


# Functions
execCmd(){
 declare -a argArray=("${!1}")
 for i in "${!argArray[@]}"; do 
  echo "[INFO] Executing command ${argArray[$i]}"
  eval ${argArray[$i]}
 done
 
}


# Main
case $1 in
 "start" )
  echo "[INFO] Starting all registered services"
  execCmd startCmd[@]
  ;;
 "stop" )
  echo "[INFO] Stopping all registered services"
  execCmd stopCmd[@]
  ;;
esac

I think all the script are quite self-explanating and i hope you find it useful. That's all
Share:

Monday, April 16, 2018

Another HOWTO about media center on Raspberry pi3 (Part 1/2)

Hi guys, it's a long time i don't touch my raspberry pi 2 media server (from now LittleBox). So with the raspberry pi3 release, i decided to do a little upgrade and creating the new LittleBox. which is the same as the old one, but with pi3, so more powerful.
Because of i have lost all the old scripts during SD formatting i decided to rewrite them and to share everything with you :-).
For the old version i decided to use just the command line version of Raspbian, so i controlled it using PuTTY sessions from my own pc (just like the old-fashioned way) this time i noticed the default version is the one with UI so ... why not? and this also has driven me to change some of the installed softwares.

Goals

My hardware configuration is about a Raspberry pi3, with a little fan, an attached HDD of 2TB formatted in NTFS and a ethernet connection. My goal is to create a small PC based on latest RaspBian installation that acts as a:
  • Media center 
  • Home Backup NAS 
  • Download station
So i've installed the following:
  • aMule: old but good... maybe 
  • avconv: useful for media conversion 
  • Plex: THE media server 
  • Transmission: just a torrent daemon 
  • VLC & AV codec: you never know 
  • Dos2Unix: sometimes used when i edit some files from Windows PC 
  • Fail2Ban: useful if you expose your little server on the internet 
  • MailUtils: utilities to send email, useful to send some mails directly to me 
  • Monit: useful to monitor some services 
  • NTFS-3G: drivers for NTFS filesystem
  • SMB Server: the best way to share files between a UNIX like system and a Windows one 

HDD Install

Let's create a folder to mount the HDD
sudo mkdir /media/Vault
sudo chmod 777 /media/Vault 
then install the NTFS drivers:
sudo apt-get install ntfs-3g
then edit the fstab file
sudo nano /etc/fstab
and add the following lines
# Custom
/dev/sda1    /media/Vault   ntfs-3g   rw,default   0   0 
Now if you reboot, the HDD will results mounted at /media/Vault

Setup SMB Sharing 

Let's now setup the SMB share, at first let's install the package
sudo apt-get install samba samba-common-bin
sudo apt-get install cifs-utils
Then let's edit the smb.conf adding the following lines
sudo nano /etc/samba/smb.conf
wins support = yes [pi] 
   comment= Pi Home 
   path=/home/pi 
   browseable=Yes 
   writeable=Yes 
   only guest=no 
   create mask=0777 
   directory mask=0777 
   public=no 

[Vault] 
   comment= Vault 
   path=/media/Vault 
   browseable=Yes 
   writeable=Yes 
   only guest=no 
   create mask=0777 
   directory mask=0777 
   public=no 
after that, you need to change the SMB password for pi user:
sudo smbpasswd -a pi 
Now you'll be able to access the pi home and the external HDD with a Windows PC.

InstAll

Be sure you have enabled SSH and VNC.
Now it's time to install aMule and Transmission and configure them to be accessible from the web
In this script i download the amule daemon and i get an encrypted version of the chosen password i will set up for the user who login to the web aMule server.
sudo apt-get install amule-daemon amule-utils 
amuled –f  
amuleweb -w 
echo -n YourPreferredPassword | md5sum | cut -d ' ' -f 1 
dc9dc28b924dc716069dc60fbdcbdc30 

nano /home/pi/.aMule/amule.conf  
Here the rows of the file i want to edit, note that i use the external HDD to store Temp files and incoming file cause i want to reduce as much as i can the write operations on the SD card:
[eMule] 
AddServerListFromServer=1 
AddServerListFromClient=1 
SafeServerConnect=1 
...
TempDir=/media/Vault/Download/Temp 
IncomingDir=/media/Vault/Download 
...

[ExternalConnect] 
AcceptExternalConnections=1 
ECAddress=127.0.0.1 
ECPort=4712 
ECPassword=dc9dc28b924dc716069dc60fbdcbdc30 

[WebServer] 
Enabled=1 
Password=dc9dc28b924dc716069dc60fbdcbdc30 
PasswordLow=dc9dc28b924dc716069dc60fbdcbdc30 
...
After that we just need to change the default amule user who is pi:
sudo nano /etc/default/amule-daemon 
AMULED_USER="pi" 
Now aMule will be available at port 4711 via browser, to make it available as soon as the server is reeboted, we can use crontab, so:
crontab -e 
#Amule 
@reboot amuled -f 
It's time to install Trasmission daemon and setup some settings so:
sudo apt-get install  transmission-daemon 
sudo nano /etc/transmission-daemon/settings.json 
Here the configuration i use, i think they are really self-descriptive:
"blocklist-enabled": true, 
"blocklist-url": "http://john.bitsurge.net/public/biglist.p2p.gz", 
"download-dir": "/media/Vault/Download" 
"incomplete-dir": "/media/Vault/Download/Temp" 
"incomplete-dir-enabled": true 
"peer-port-random-on-start": false, 
"port-forwarding-enabled": true, 
rpc-password: YourPreferredPassword, 
rpc-username: pi,  
rpc-whitelist: *.*.*.* 
sudo /etc/init.d/transmission-daemon reload 
sudo /etc/init.d/transmission-daemon restart 
Now let's install Plex Media Server, using a custom repository from dev2day
sudo apt-get update && sudo apt-get install apt-transport-https -y --force-yes 
wget -O - https://dev2day.de/pms/dev2day-pms.gpg.key | sudo apt-key add - 
echo "deb https://dev2day.de/pms/ jessie main" | sudo tee /etc/apt/sources.list.d/pms.list 
sudo apt-get update 
sudo apt-get install plexmediaserver -y 
sudo apt-get install libexpat1 -y 
sudo apt-get install mkvtoolnix -y 

sudo service plexmediaserver restart 

sudo nano /etc/default/plexmediaserver 
PLEX_MEDIA_SERVER_TMPDIR=/media/Vault/Download/Temp 
PLEX_MEDIA_SERVER_USER=pi 
sudo chown pi /var/lib/plexmediaserver/ 
and now we can install al the other software stated before
sudo apt-get install libav-tools libavcodec-extra vlc dos2unix ufw fail2ban
Now it's time for Monit which will help us to quickly understand what's going on on our little server
sudo apt-get install monit 
sudo nano /etc/monit/monitrc
set httpd port 2812 address 0.0.0.0 
   allow 0.0.0.0/0.0.0.0 
   allow pi:YourPreferredPassword 

check process aMule matching "amuled" 
   start program = "/etc/init.d/amule-daemon start" 
   stop program = "/etc/init.d/amule-daemon stop" 
   if failed host 127.0.0.1 port 4711 then restart 

check process Plex with pidfile "/var/lib/plexmediaserver/Library/Application Support/Plex Media Server/plexmediaserver.pid" 
    start program = "/etc/init.d/plexmediaserver start" 
    stop  program = "/etc/init.d/plexmediaserver stop" 
    if failed port 32400 type tcp then restart 
    if 3 restarts within 5 cycles then alert 

check process SSHd 
    with pidfile "/var/run/sshd.pid" 
    start program = "/etc/init.d/sshd start" 
    stop program = "/etc/init.d/sshd stop" 
    if 3 restarts within 3 cycles then alert 
    if failed port 22 protocol ssh then restart 

check process Transmission matching "transmission-daemon" 
    start program = "/etc/init.d/transmission-daemon start" 
    stop program  = "/etc/init.d/transmission-daemon stop" 
    if failed host 127.0.0.1 port 9091 type TCP for 2 cycles then restart 
    if 2 restarts within 3 cycles then unmonitor 
So now everything is lock and load but in the second part, that i promise, it will be more interesting, "i'll introduce some custom scripts that will help you to manage your personal littlebox, stay tuned

Monday, April 9, 2018

Update Content Type in sandbox solution: a forgotten beauty

Like i said in previuos blog posts, i'm using a lot BP with SP on premise or O365, in order to implement a centralized approach to attended RPA.
As we already know, nowaday the most used approach is to use PnP scripts and this is something i really like, but i also have to deal with a great team with really good skills in RPA and IT in general, but i could not waste my time explaining how to use another tool, because of we need to just to set up some SP web sites with old-fashioned custom lists.
So i explained them something about sandbox solution, but surprise surprise, customer enjoyed a lot the POC and asked us lot of CRs, including adding some JavaScript to the custom form and (nooooo!) adding fields to content types.
With Francesco Cruciani (thx man), I figured out how to solve the problem, simply attacking the feature manifest.
The solution is really simple and you can download it simply clicking here.
As you can see we have:
  • Some fields
  • 1 CT
  • 1 List definition
  • 1 Feature 
Solution structure
Installing the sandbox you will just have to provision manually the list instance in order to be ready to use it.
Now, let's start with the update:
  1. Let's add a Field file: we called it Fields_Update
  2. Then update the CT and List Definition: we like order ;-)
The key is now simply here:
Only visible difference is Fields_Update
We just add the new module in the feature
Now let's focus on Test.SandBox.DataStructure.Template.xml


As you can see we have just applied the new manifest, with an explicit reference to the action of adding field to a content type and then pushing down the update, so also the content type instances will be updated: you just have to upload again the wsp with a different name, and upgrade the solution from SandBox solution menu and that's all.

No way if you want to change order of Field in the mask or change data type, we have not investigated further.
This post helps you only to remember that sometimes, old fashioned way could be useful to make your life a little easier.

Monday, April 2, 2018

A Blue Prism project with custom DLLs: 4 dummies

It seems this blog post was found really interesting from lot of you, but i also read a lot of comments about how can you set up a project and use DLL with BP, so i will show you a practical and really simple example.
Here below the code of the DLL i will use, just two classes:
  1. Log Helper: write something in the event viewer (could be useful for bug hunting)
  2. Program: the typical entry point for every .NET console application
LogHelper.cs
using System;
using System.Diagnostics;

namespace BP.ExternalDll.Example
{
    public class LogHelper
    {
        private readonly string _log;
        private readonly string _source;

        public LogHelper(string source, string log)
        {
            _source = source;
            _log = log;
        }
        
        public void LogWarning(string message)
        {
            try
            {
                CreateEventSource();
                EventLog.WriteEntry(_source, message, EventLogEntryType.Warning);
            }
            catch (Exception)
            {
                // ignored
                // If you're here, it means you cannot write on event registry
            }
        }
        
        private void CreateEventSource()
        {
            if (!EventLog.SourceExists(_source))
            {
                EventLog.CreateEventSource(_source, _log);
            }
        }
    }
}
Program.cs
namespace BP.ExternalDll.Example
{
    public class Program
    {
        public static void Log()
        {
            string currentDirectory = System.Environment.CurrentDirectory;
            LogHelper _helper = new LogHelper("BP.ExternalDll.Example", "Test library");
            _helper.LogWarning(currentDirectory);
        }

        static void Main(string[] args)
        {
            Log();
        }
    }
}
So, compile everything and place your brand new DLL in this folder: C:\Program Files\Blue Prism Limited\Blue Prism Automate .
Don't try to put the file in other folders in your PC or organize the BP folder with subfolders: it will not work and don't argue with me that BP offers this functionality, IT DOESN'T WORK.
I said: IT DOESN'T WORK
I've figured out with Antonio Durante how to overcome this problem but I think i will try this in the next future.
In the code block you just have to write:
Program.Log()
and you will start to find some new rows in your event viewer. It's clear that this is just a little example, you can complicate the things as you wish.
My advice is to create always a BusinessDelegate class that holds all the methods you want to expose and create a single VBO action for every method in the BP, this will enhance testability and maintenance. That's all folks!


Me, myself and I

My Photo
I'm just another IT guy sharing his knowledge with all of you out there.
Wanna know more?